Unlock Healthier Baking: Simple Steps to Make & Store Oat Flour
In a world increasingly focused on wholesome, unprocessed foods, the desire for homemade ingredients is soaring. You might be surprised to learn that one of the most versatile and nutritious flours can be effortlessly created right in your own kitchen: oat flour. Loved for its unique nutty flavor and impressive health benefits, oat flour has become a cornerstone in healthier baking, particularly for those seeking delightful gluten-free alternatives. As we move towards a future (and indeed, already live in one) where consumers are more conscious about the preservatives and additives in commercially prepared products, mastering the art of making your own oat flour is an empowering step towards creating truly wholesome baked goods.
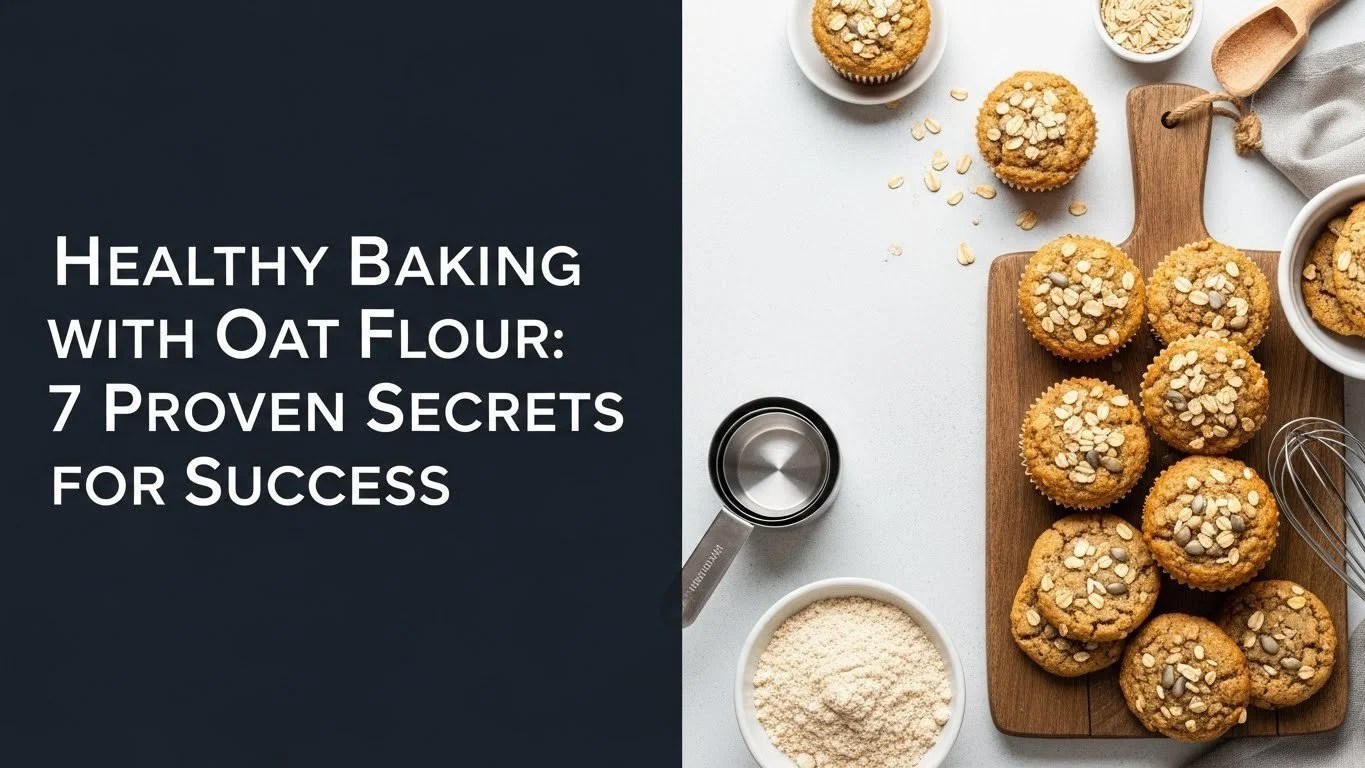
Whether you're dreaming of fluffy pancakes, chewy cookies, artisan bread, or tender muffins, homemade oat flour can elevate your culinary creations. This comprehensive guide will walk you through the simple process of transforming whole oats into a fine, ready-to-use flour, delve into its nutritional advantages, and provide expert tips for optimal storage, ensuring your batches stay fresh for longer. Dive in and discover how easy it is to enhance your cooking game with this incredibly adaptable ingredient!
Why Choose Homemade Oat Flour?
Opting to make your own oat flour offers a multitude of benefits that extend beyond mere convenience. It's a choice that reflects a commitment to health, quality, and often, budget-friendliness. Understanding these advantages can inspire you to embrace this simple kitchen craft.
- Exceptional Nutritional Profile: Oat flour is a nutritional powerhouse, retaining all the goodness of whole oats. It's packed with soluble fiber, which is known to aid digestion, promote satiety, and help stabilize blood sugar levels – a significant benefit for managing energy throughout the day. Furthermore, it provides a good source of plant-based protein, essential for muscle repair and overall bodily functions, along with vital B vitamins and minerals like magnesium and phosphorus.
- A Naturally Gluten-Free Alternative: For individuals with gluten sensitivities or celiac disease, oat flour is a fantastic gluten-free choice. It allows you to enjoy a wide array of baked goods without compromising on flavor or texture. However, it's crucial to note that while oats are naturally gluten-free, cross-contamination can occur during processing. For strict gluten-free diets, always opt for certified gluten-free oats. For more on the benefits, explore Gluten-Free & Budget-Friendly: The Power of Homemade Oat Flour.
- Cost-Effective & Quality Control: Buying pre-made oat flour can be surprisingly expensive. By making it yourself, you significantly reduce costs, especially if you purchase oats in bulk. More importantly, you gain complete control over the quality of your ingredients. You can select organic oats, ensure they are additive-free, and guarantee freshness, something store-bought versions can't always promise.
- Pure & Preservative-Free: Many commercially prepared flours can contain anti-caking agents or other additives. Making oat flour at home guarantees that your product is 100% pure oats, free from any unwanted chemicals or preservatives. This aligns perfectly with the growing trend towards cleaner eating and transparency in food preparation.
Your Essential Toolkit for Making Oat Flour
The beauty of making oat flour at home lies in its simplicity and the minimal equipment required. Chances are, you already have everything you need in your kitchen.
The Single Ingredient: Whole Oats
The foundation of your homemade oat flour is, naturally, whole oats. The good news is that most types of plain oats will work beautifully:
- Rolled Oats (Old-Fashioned Oats): These are the most common and widely recommended for oat flour. They grind down easily and yield a good texture.
- Quick Oats (Instant Oats): While slightly finer to begin with, quick oats can also be used. They may require slightly less blending time.
- Steel-Cut Oats: These are the least processed and hardest form of oats. While they can be ground into flour, they will require a more powerful blender and a longer processing time to achieve a fine consistency.
Important Note: Always use plain, unflavored oats. Avoid instant oatmeal packets that contain added sugars, flavors, or spices, as these will affect the taste and quality of your final oat flour.
Gather Your Tools:
- A High-Speed Blender or Food Processor: This is your primary tool. A powerful blender will yield the finest, smoothest flour, but a good quality food processor can also do the job effectively.
- A Fine-Mesh Sieve or Strainer: Essential for sifting your flour to ensure a consistent, lump-free texture.
- An Airtight Container: For proper storage and to maintain freshness.
Step-by-Step Guide: Crafting Your Own Oat Flour
The process of making oat flour is incredibly straightforward and takes just a few minutes. Here's how to do it:
- Measure Your Oats: Decide how much oat flour you want to make. A good rule of thumb is that 1 cup of whole oats typically yields approximately 1 cup of oat flour. While the volume is similar, the weight will differ, so for precise baking, it's always best to measure your finished flour by weight.
- Load into Blender/Food Processor: Carefully pour the measured oats into the blending jar or food processor bowl. Avoid overfilling, as this can lead to uneven grinding and strain your appliance. It's better to work in batches if you're making a large quantity.
- Blend Until Fine: Secure the lid and blend the oats on high speed. For most blenders, this takes anywhere from 30 seconds to 1 minute. You're looking for a fine, powdery consistency, similar to regular wheat flour.
- Pro Tip: For the smoothest texture, pause your blender every 15-20 seconds and give the jar a gentle shake or stir the oats with a spoon (with the blender off and unplugged!) to ensure even grinding and prevent the flour from overheating.
- Sift for Perfection: Once you believe the oats are finely ground, transfer them to a fine-mesh sieve placed over a bowl. Gently shake and tap the sieve to sift the flour through. Any larger, unground pieces will remain in the sieve.
- Re-Blend Coarse Pieces: Don't discard the coarse pieces! Return them to the blender and blend again until they reach the desired fine consistency. Repeat the sieving process until virtually all the oats have been transformed into fine flour. This step is key for uniform results in your baking.
- Store Properly: Once your oat flour is uniformly fine, transfer it to an airtight container. Your homemade oat flour is now ready for use! For a deeper dive into the process, check out Make Your Own Oat Flour: A Step-by-Step Guide for Healthier Cooking.
Maximizing Freshness: Storing Your Homemade Oat Flour
Proper storage is crucial for maintaining the freshness, flavor, and shelf life of your homemade oat flour. Because it contains natural oils, oat flour can become rancid more quickly than traditional wheat flour if not stored correctly.
Storage Options & Shelf Life:
- Pantry (Cool, Dark Place): For everyday use, an airtight container stored in a cool, dark pantry or cupboard is ideal. Kept this way, your oat flour should remain fresh for up to 3 months. Ensure the container is truly airtight to prevent moisture and air exposure.
- Refrigerator: To extend its shelf life further, store your oat flour in an airtight container in the refrigerator. This can keep it fresh for up to 6 months. The cooler temperature significantly slows down the oxidation of the natural oils.
- Freezer: For the longest storage duration, the freezer is your best friend. Stored in an airtight, freezer-safe container or bag, oat flour can last for up to 1 year. This is an excellent option if you make large batches.
Important Storage Considerations:
- Airtight is Key: Regardless of the storage method, an airtight container is non-negotiable. Exposure to air is the primary cause of rancidity.
- Temperature Acclimatization: If storing in the refrigerator or freezer, always bring your oat flour back to room temperature before using it in recipes. Cold flour can affect the texture of your baked goods and may absorb liquids differently.
- Check for Spoilage: Before each use, especially if it's been stored for a while, give your oat flour a quick check. Look for any changes in color (it might appear yellowish or brownish) or, more importantly, sniff for any off-odors. Fresh oat flour has a mild, pleasant, nutty aroma. If it smells sour, bitter, or like old crayons, it has likely gone rancid and should be discarded.
Beyond the Basics: Unleashing the Versatility of Oat Flour
Now that you have a fresh batch of homemade oat flour, the possibilities are endless! Its slightly sweet, nutty flavor complements a wide range of dishes.
- Baking Staples: Use it to make incredibly moist muffins, wholesome cookies, dense breads, and light, fluffy pancakes. It's particularly fantastic in quick bread recipes.
- Thickening Agent: Oat flour can also serve as a natural thickening agent for soups, stews, and gravies, adding a subtle depth of flavor.
- Breading: A light coating of oat flour can make for a delightful gluten-free breading for chicken or fish.
Substitution Tips: When substituting oat flour for wheat flour in recipes, remember that oat flour tends to absorb more liquid. As a general guideline, start by replacing about 7/8 or 3/4 of the wheat flour called for with oat flour, and then add more liquid to your batter or dough as needed to achieve the desired consistency. For yeast breads, you may want to combine it with other gluten-free flours or use a binder like xanthan gum to achieve the desired structure.
Conclusion
Making your own oat flour at home is a simple, cost-effective, and incredibly rewarding endeavor. It empowers you to take control of your ingredients, embrace a healthier lifestyle, and unlock a world of delicious baking possibilities. With just one ingredient and a few basic tools, you can consistently produce fresh, wholesome oat flour that elevates your culinary creations and aligns with your commitment to clean eating. So, grab your oats, fire up your blender, and start enjoying the rich flavor and nutritional benefits of homemade oat flour today!
